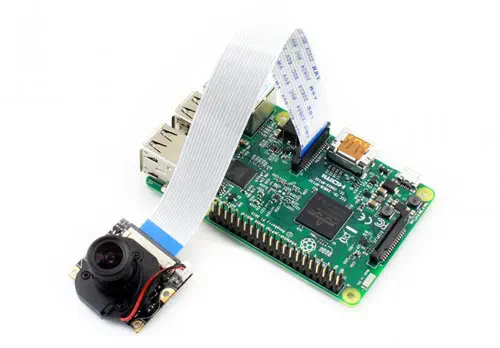
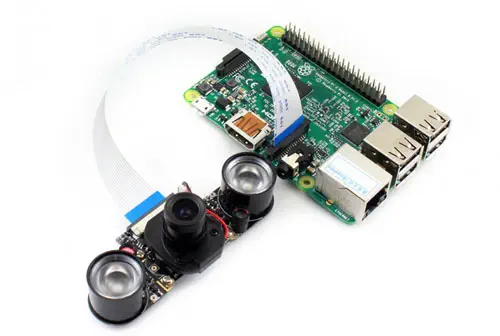
Raspberry Pi-cameramodule met infraroodfilter

Opslaan €7,67
WaveshareArtikelnummer:RB-Wav-89
Fabrikant #: 12076

Prijs  :
Verkoopprijs €23,47 Normale prijs €31,14

Inclusief belasting

Verzending berekend bij het afrekenen

Voorraad  :
Nog maar 1 eenheid over

Betalingen en veiligheid

Apple Pay Mastercard PayPal Visa

Uw betalingsgegevens worden veilig verwerkt. We slaan geen creditcardgegevens op en hebben ook geen toegang tot uw creditcardgegevens.

Description

  • Raspberry Pi Camera, ondersteunt alle revisies van de Pi
  • Ingebed verwijderbaar IR-CUT filter, elimineert kleurvervorming bij daglicht
  • Wordt geleverd met infrarood-LED, ondersteunt nachtzicht
  • 5 megapixel OV5647-sensor

Raspberry Pi Camera Module met IR Filter - Klik om te vergroten

  • 1x - RPi IR-CUT-camera
  • 2x - Infrarood LED-kaart (B)
  • 1x - 15-pins FFC (tegenoverliggende zijden contact)
  • 31 mm × 32 mm

Raspberry Pi Camera Module met IR Filter- Klik om te vergroten

Camera

  • CCD-formaat: 1/4 inch
  • Diafragma (F): 1.8
  • Brandpuntsafstand: 3,6 mm instelbaar
  • Gezichtsveld: 75.7 graden
  • Sensor beste resolutie: 1080p

4 schroefgaten

  • Gebruik voor vastmaken
  • Biedt een uitgangsvermogen van 3,3 V
  • Ondersteunt het aansluiten van infrarood-LED en / of opvullen van de LED-flitser

Customer Reviews

Based on 4 reviews
50%
(2)
50%
(2)
0%
(0)
0%
(0)
0%
(0)
J
Jason
Good, but power is an issue.

The LED's bolt up to the side of the camera and all seems well on initial bench testing. But because the LED's use the 3v power through the camera cable it causes the camera to drop out if you use a longer cable - my 3ft cable would not work. Further, the ~800mA load on the 3v regulator heats up the Pi pretty good. So I've removed the LED's and I power them directly from the 5V power supply with good results. The IR filter can be engaged by turning the camera LED On/Off but this requires a reboot each time - There is also a TTL input on the camera that i've wired to the PI's GPIO for better control without rebooting. I wish the LED's had an output from the light sensor to that controlled the filter.

P
Pavel
Watch your amps and heat

If you are looking for datasheet, it's right here: https://www.waveshare.com/w/upload/6/61/RPi-Camera-User-Manual.pdf. You have to manage your heat when used in a sealed enclosure, IR emitters give off a lot of heat. I also would suggest to run them on a separate 3.3V 2-3A supply - emitters are power-hungry. Otherwise, the IR-CUT is pretty good for the price. Angle of view (FOV) could be a bit better, I also get few bleak pixels that come and go with temperature. There's an on-board GPIO hole in PCB that you could wire to enable/disable IR filter through shell, instead of going to config.txt every time.

P
Pavel
Surveillez vos amplis et la chaleur

Si vous recherchez une fiche technique, vous le trouverez ici: https://www.waveshare.com/w/upload/6/61/RPi-Camera-User-Manual.pdf. Vous devez gérer votre chaleur lorsqu'il est utilisé dans une enceinte étanche. Les émetteurs infrarouges dégagent beaucoup de chaleur. Je suggérerais également de les utiliser sur une alimentation séparée de 3,3 V, 2-3 A - les émetteurs sont avides d'énergie. Sinon, l'IR-CUT est plutôt bien pour le prix. L’angle de vue pourrait être un peu meilleur, j’ai aussi quelques pixels sombres qui vont et viennent avec la température. Il y a un trou GPIO intégré dans le circuit imprimé que vous pouvez câbler pour activer / désactiver le filtre infrarouge par le biais du shell, au lieu d'aller à config.txt à chaque fois.

J
Jason
Bien, mais le pouvoir est un problème.

La DEL s’allume sur le côté de la caméra et tout semble bien aller lors des premiers essais sur banc. Mais comme les DEL utilisent l'alimentation 3v via le câble de la caméra, celle-ci tombe si vous utilisez un câble plus long. Mon câble de 3 pieds ne fonctionnerait pas. De plus, la charge de ~ 800mA sur le régulateur 3v chauffe assez bien le Pi. J'ai donc retiré les LED et je les alimente directement à partir de l'alimentation 5V avec de bons résultats. Le filtre IR peut être activé en allumant / éteignant le voyant de la caméra, mais cela nécessite un redémarrage à chaque fois. Il existe également une entrée TTL sur la caméra que j'ai connectée au GPIO du PI pour un meilleur contrôle sans redémarrage. J'aurais aimé que le capteur de lumière émette une lumière à celle contrôlée par le filtre.

Verzending schatten:

Dit vind je misschien ook leuk