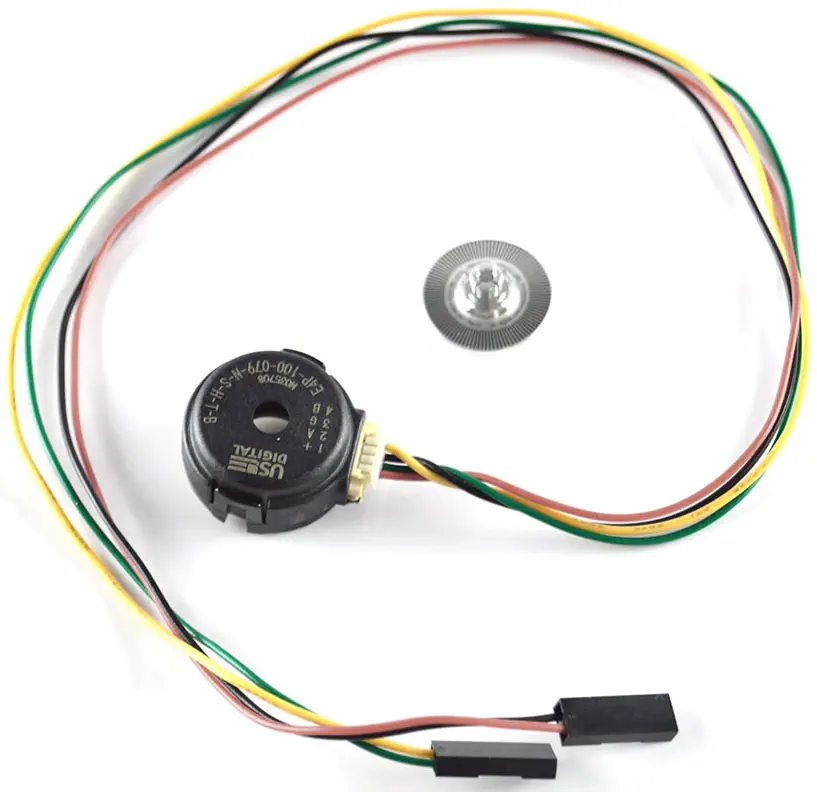
Lynxmotion Quadrature Motor Encoder V2 (Met kabel)

LynxmotionArtikelnummer:RB-Lyn-929
Fabrikant #: QME-02

Prijs  :
Verkoopprijs €49,85

Inclusief belasting

Verzending berekend bij het afrekenen

Voorraad  :
Nog maar 2 eenheden over

Betalingen en veiligheid

Apple Pay Mastercard PayPal Visa

Uw betalingsgegevens worden veilig verwerkt. We slaan geen creditcardgegevens op en hebben ook geen toegang tot uw creditcardgegevens.

Description

  • Quadratuur-encoder met twee uitgangssignalen
  • Speciaal ontworpen voor de Lynxmotion 12VDC 200tpm, 0.78Kg-cm GHM-16 met achterasen 7.2VDC 291RPM 11oz-in GHM-03 Spur Gear Head Motor (met achteras)
  • Wordt op de uitgaande as van de versnellingsbak vastgemaakt
  • Kabel is inbegrepen
  • Motor en montage zijn niet inbegrepen

Lynxmotion Quadrature Motor Encoder V2 (w/Cable)- Click to Enlarge

De Lynxmotion Quadrature Motor Encoder V2 (Met kabel) is ontworpen voor de 12VDC, 200 rpm, 0.78Kg-cm GHM-16 (met achteras) en 7.2VDC 291 RPM 11oz-in GHM-03 Spur Gear-kopmotor (w / achter) Shaft), wordt apart verkocht. De oorspronkelijke V1-encoder werd stopgezet, terwijl de vervanging niet goed over het plastic rond de achteras past, dus een lexaan afstandsstuk en tape zijn inbegrepen.

  • USDigital Quadrature encoder topcase (schroeven in Lexan hieronder)
  • USDigital Quadrature encoder-onderbak
  • USDigital PCB en encoderschijf
  • Lexan spacer (verwijder plastic aan beide kanten)
  • Twee montageschroeven om de onderkant te verbinden met lexan
  • Schuimtape met plakband aan beide zijden
  • Verbindingskabel

PDF bestand

  • Cycli per omwenteling: 100
  • Kwadratuur telt per omwenteling: 400
  • Frequentie: 30 kHz

Customer Reviews

Based on 5 reviews
80%
(4)
0%
(0)
0%
(0)
20%
(1)
0%
(0)
E
Ellis
Bon produit

J'ai le mien depuis environ 10 ans. C'était du plastique à l'époque. J'ai lu quelques critiques, donc s'il s'agissait de métal, c'était avant il y a 10 ans. J'ai dû mettre une petite goutte de colle à quelques endroits pour les tenir. Mais cela fonctionne comme il se doit.

E
Ellis
Fine product

Ive had mine for around 10 years. It was plastic then. I read a few reviews so if they was metal it was before 10 years ago. I did have to put a small drop of glue a couple spots to hold them. But it works as should.

T
TCIII
A quality Lynxmotion motor encoder that is somewhat difficult to install

I received the US Digital quadrature motor encoder in the mail today and found that the installation instructions, on the Lynmotion website, are sorely lacking in relation to successfully installing the encoder on the back of the motor. I knew this already so it was no surprise. The spacer ring used to mount the encoder assembly on the back of the motor initially did not fit flush to the motor back surface due to the spacer ring sitting on top of the motor power terminal bosses. Filing clearance dimples in the bottom of the spacer ring edge solved that problem. The spacer ring is now gluing to the back of the motor and should be dry by tomorrow morning. I can then attach the encoder assembly to the mounting ring followed by the encoder wheel. US Digital usually supplies a spacer to correctly distance the encoder wheel above the encoder assembly, but was not included in the kit. Guess that I will have to wing it. Once assembly is complete I expect it will function correctly as all Lynxmotion products do.

T
Thomas
The first encoder I bought worked so well that I bought a second encoder

After assembling and installing the first encoder I decided to assemble and install a second encoder. I can't emphasize enough that the circular Lexan base must be flush to the back of the motor. That means notching the bottom of the base to clear the motor power terminal bosses and flattening the raised lettering on the back of the motor. If you do this your encoder will mount perfectly flat to the back of the motor. US Digital states that the encoder disk should stand off of the encoder detector by 0.070 in which is hard to accomplish without the alignment tool they provide in their kit. All I can say is place the encoder disk on a flat, hard surface, align the motor shaft with the hole in the disk, and with reasonable pressure press the motor shaft into the disk until it bottoms out on the hard surface. Now find a tool, like a nut driver, that can slide over the motor shaft and CAREFULLY begin to push the disk towards the encoder detector constantly checking the clearance. You might try to eyeball the correct spacing and be successful. I used a caliper, a magnifying glass, and came within 0.01 in of the correct spacing which worked for me. Take your time and you will prevail.

A
Alexey
Worse than the first version

More difficult to assemble than the first version. Encoder disk is partially made from plastic, while the first version was fully metallic - seems like a downgrade. During assemble, the manual suggest to force screws into the plastic, as the result, the entire construction doesn't sit firmly - I could easily detach it by hand with a little force.

Verzending schatten:

Dit vind je misschien ook leuk